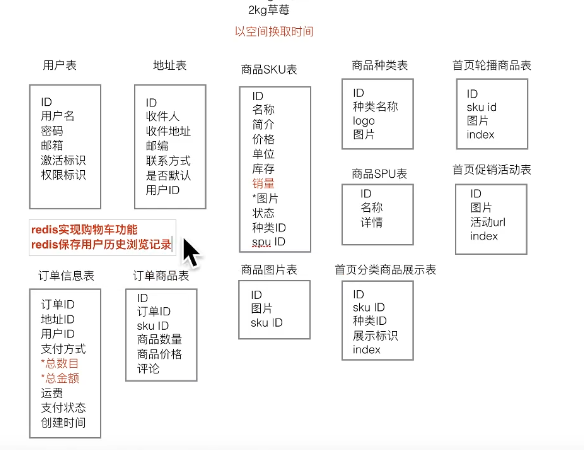
首页模块
IndexView中加入信息
在goods/views.py加入indexview的功能
from django.urls import pathfrom .views import IndexViewapp_name = 'goods' urlpatterns = [ path('' , IndexView.as_view() ,name='index' ) ]
from django.core.paginator import Paginatorfrom django.shortcuts import render, redirect, reversefrom django.views.generic.base import Viewfrom django_redis import get_redis_connectionfrom django.core.cache import cachefrom goods.models import GoodsType, IndexGoodsBanner, IndexTypeGoodsBanner, IndexPromotionBanner, GoodsSKUfrom order.models import OrderGoodsclass IndexView (View ): def get (self, request ): types = GoodsType.objects.all () goods_banners = IndexGoodsBanner.objects.all ().order_by('index' ) promotion_banners = IndexPromotionBanner.objects.all ().order_by('index' ) for type in types: image_banners = IndexTypeGoodsBanner.objects.filter (type =type , display_type=1 ) title_banners = IndexTypeGoodsBanner.objects.filter (type =type , display_type=0 ) type .image_banners = image_banners type .title_banners = title_banners user = request.user cart_count = 0 if user.is_authenticated: conn = get_redis_connection('default' ) cart_key = 'cart_%d' %user.id cart_count = conn.hlen(cart_key) context = { 'types' :types, 'goods_banners' :goods_banners, 'promotion_banners' :promotion_banners, 'cart_count' :cart_count } return render(request, 'index.html' , context)
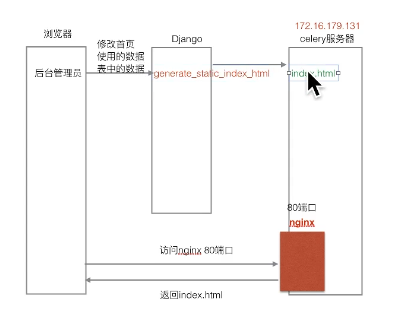
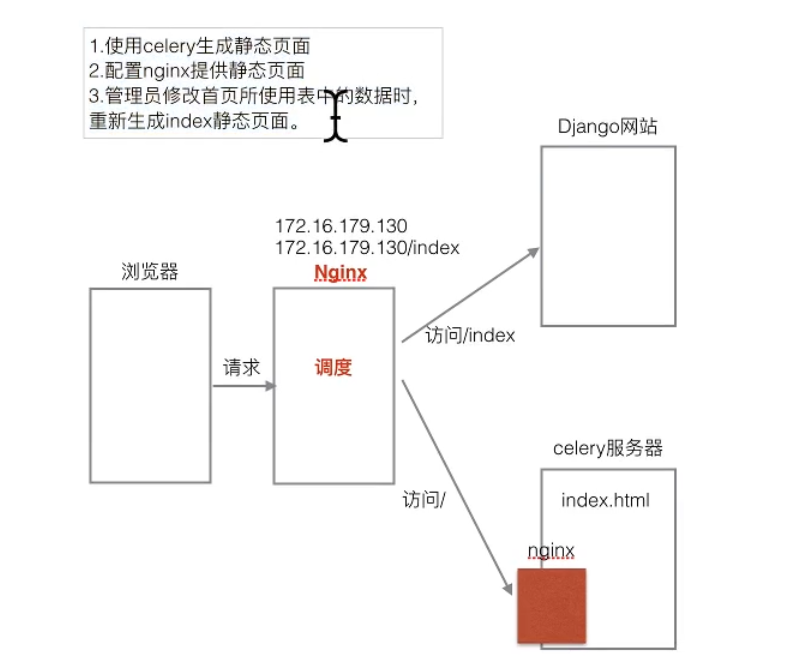
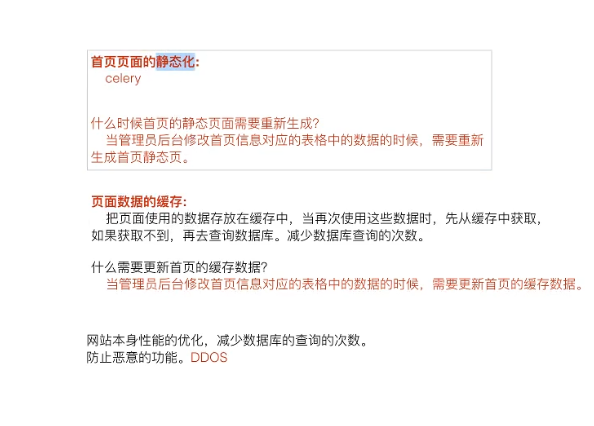
使用celery生成Index的static文件
新建任务:
注意:
@app.task def generate_static_index_html (): types = GoodsType.objects.all () goods_banners = IndexGoodsBanner.objects.all ().order_by('index' ) promotion_banners = IndexPromotionBanner.objects.all ().order_by('index' ) for type in types: image_banners = IndexTypeGoodsBanner.objects.filter (type =type , display_type=1 ) title_banners = IndexTypeGoodsBanner.objects.filter (type =type , display_type=0 ) type .image_banners = image_banners type .title_banners = title_banners context = { 'types' : types, 'goods_banners' : goods_banners, 'promotion_banners' : promotion_banners, } temp = loader.get_template('static_index.html' ) static_index_html = temp.render(context) save_path = os.path.join(settings.BASE_DIR, 'static/index.html' ) with open (save_path, 'w' ) as f: f.write(static_index_html)
在admin的委托返回调用中,执行celery
在goods的admin.py中监听一下admin后台的save和delete操作,然后执行celery刷新内容返回。
在admin.py中加入
class BaseModelAdmin (admin.ModelAdmin): def save_model (self, request, obj, form, change ): super ().save_model(request, obj, form, change) from celery_tasks.tasks import generate_static_index_html generate_static_index_html.delay() def delete_model (self, request, obj ): super ().delete_model(request, obj) from celery_tasks.tasks import generate_static_index_html generate_static_index_html.delay()
遇到问题: 第一次修改后,celery生成的页面太快了,还没等save-model结束,因此查出来的数据是旧的。下一次又可以刷出最新数据
将index页面的两种获取方式调度起来
使用django的缓存机制存储页面
https://docs.djangoproject.com/zh-hans/3.0/topics/cache/
cache.set () pass cache.get()
cache.delete(index_cache_key)
小结:缓存机制的目的之一在于防止黑客利用各多台电脑进行访问型攻击(DDOS),缓存通过减少数据库的查询次数,实现对性能的优化。
使用redis存储购物车数据
商品详情页面
1.views.py 为页面添加必要数据
def get (self, request, goods_id ): try : good_sku = GoodsSKU.objects.get(id =goods_id) except GoodsSKU.DoesNotExist: return redirect(reverse("goods:index" )) all_good_types = GoodsType.objects.all () sku_orders = OrderGoods.objects.filter (sku=good_sku).exclude(comment='' ) new_skus = GoodsSKU.objects.filter (type =good_sku.type ).order_by("-create_time" ) user = request.user cart_count = 0 if user.is_authenticated: conn = get_redis_connection('default' ) cart_key = 'cart_%d' % user.id cart_count = conn.hlen(cart_key) context = { "sku" : good_sku, "types" : all_good_types, "sku_orders" : sku_orders, "new_skus" : new_skus, "cart_count" : cart_count } return render(request, 'detail.html' ,context)
2.页面编辑
使用双curly braces(放变量)或百分号的curly braces(放语句)
forloop.counter来获取循环当前的ID
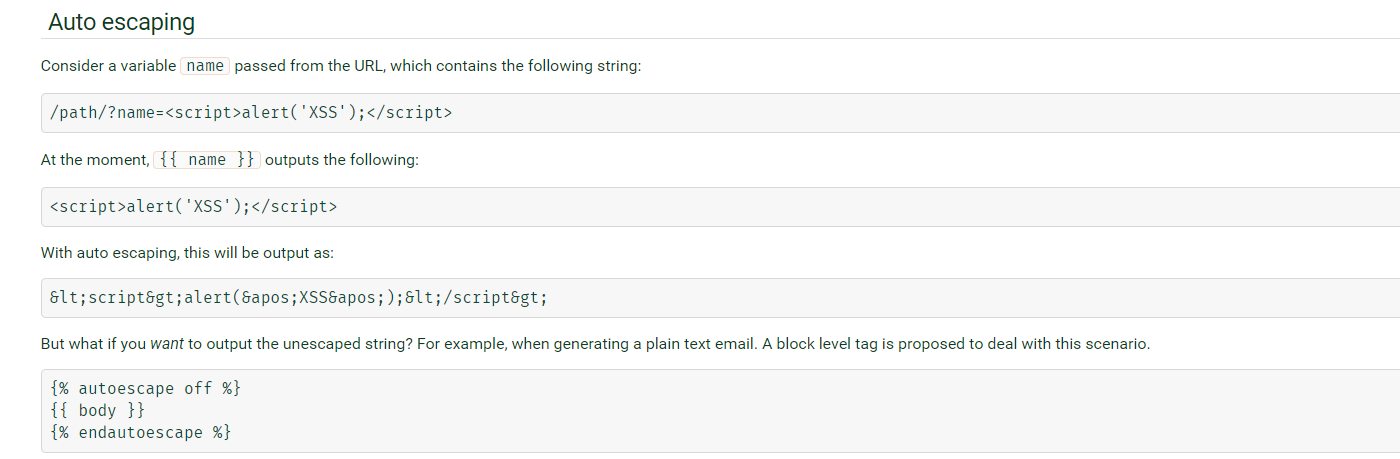
3.关闭escape转义
1.使用autoescape off来关闭转义,
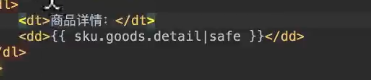
2.使用| safe来关闭转义
商品列表页
分析页面
使用/list/type/page?sort=default 这种地址来设计
分页的功能实现
使用Paginator分页来查询分页
路径传递方式
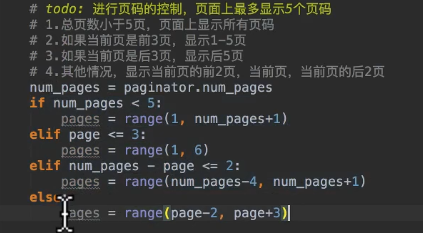
页码控制
遇到一个问题:get误写成filter,后果就是把这些结果放里面搜索会报 The QuerySet value for an exact lookup must be limited to one result using slicing. 以后需要注意
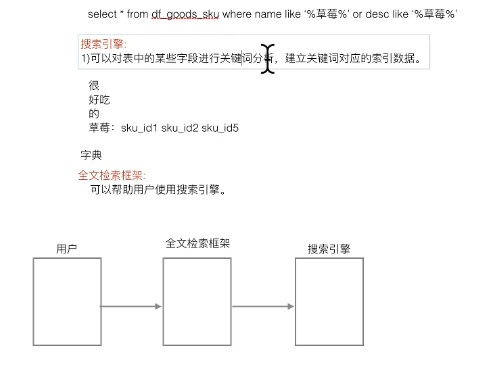
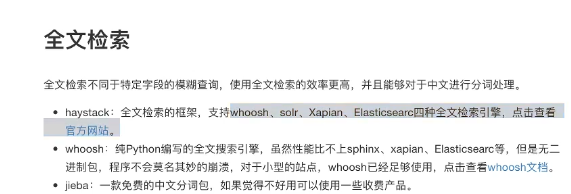
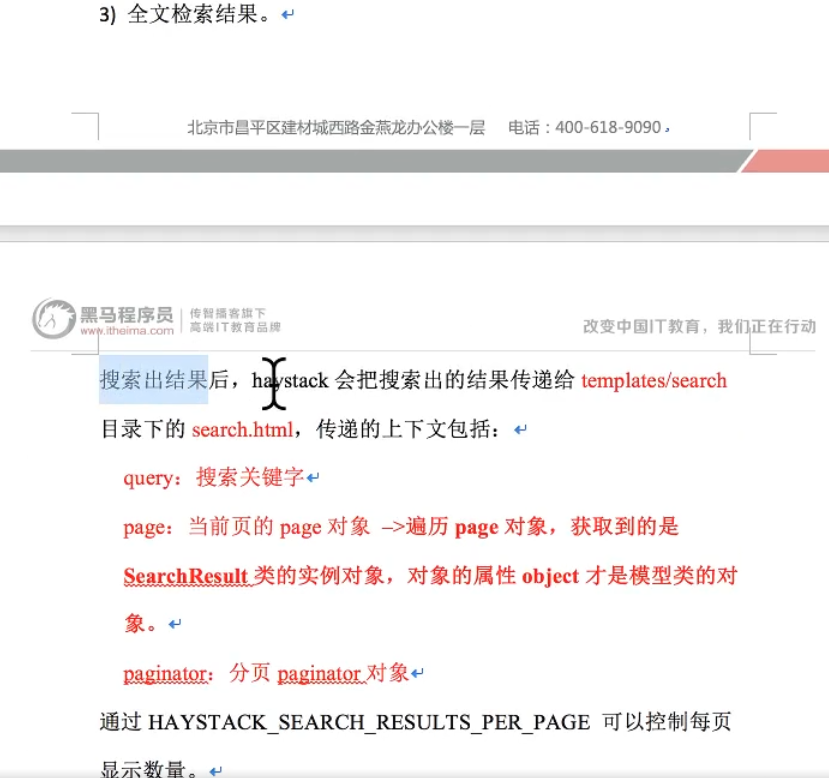
搜索引擎与全文检索
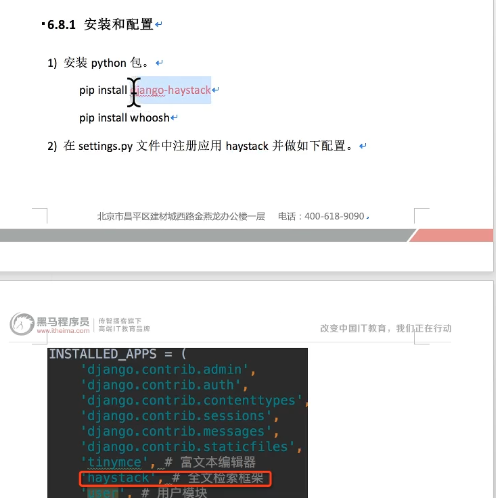
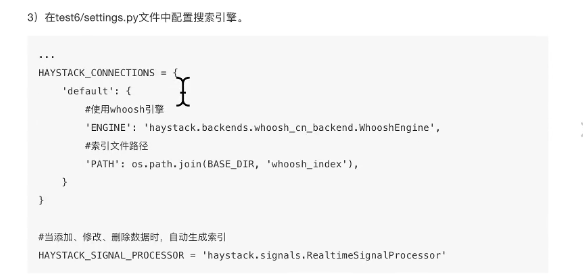
使用haystack的全文检索框架,whoosh的搜索引擎
haystack默认安装无如下内容,需按情况配置
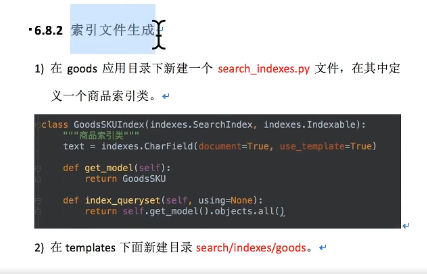
索引文件生成:
官网
改成如下:
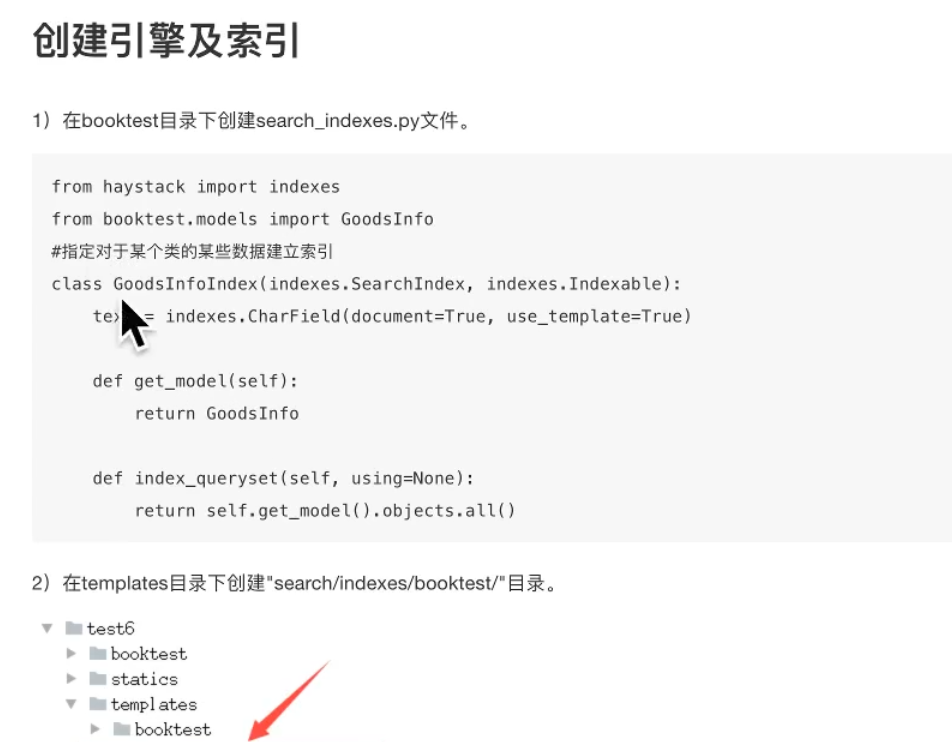
from haystack import indexesfrom goods.models import GoodsSKUclass GoodsSKUIndex (indexes.SearchIndex, indexes.Indexable): text = indexes.CharField(document=True , use_template=True ) def get_model (self ): return GoodsSKU def index_queryset (self, using=None ): return self.get_model().objects.all ()
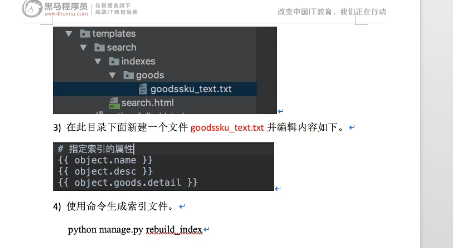
手动建立模型文件
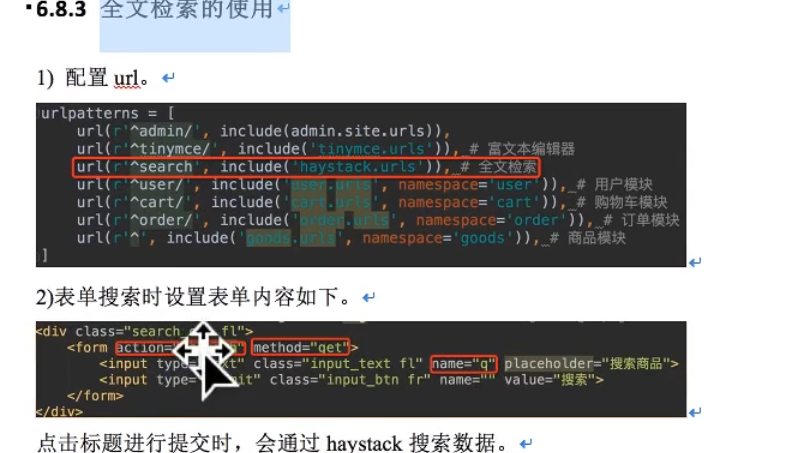
表单中,参数名:q为写死的。method=‘get’是写死的
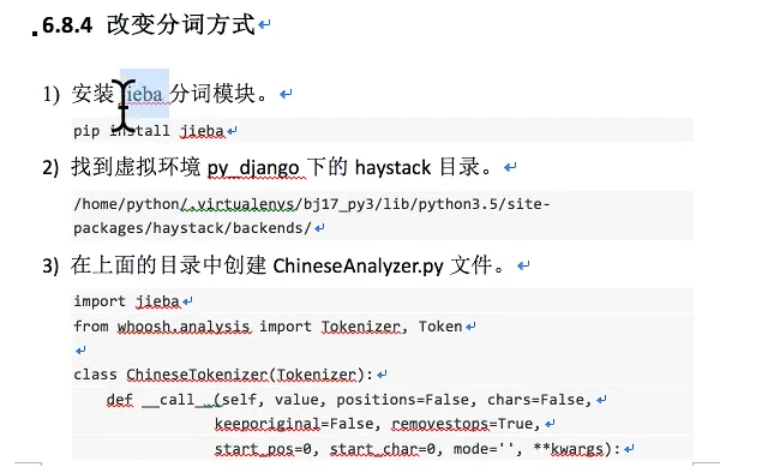
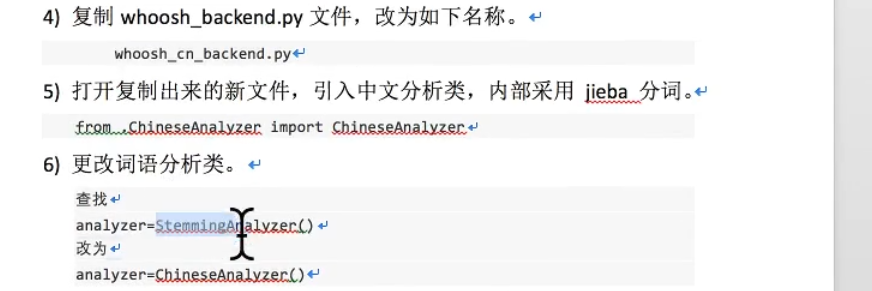
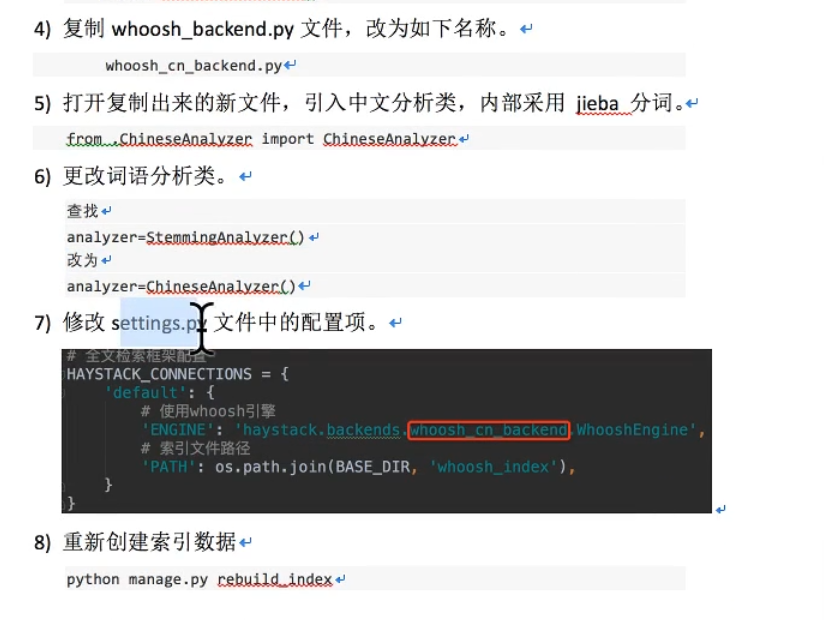
改变分词方式:
创建ChineseAnalyzer.py ,写入:
总结: 选一个全文搜索的框架,如这里的haystack(django内置的),再找一个搜索引擎,如这里的whoosh引擎, 使用时会生成index文件,一般在配置中指明。在执行搜索时,引擎会在Index中查找。 另外也可以为其指定一个分词规则,如这里的jieba,这样可以根据分词来生成搜索。
购物车模块
商品详情个数的JS
update_price ();function update_price ( price = $('.show_pirze' ).children ('em' ).text (); count = $('.num_show' ).val (); price = parseFloat (price); count = parseInt (count); amount = price * count; $('.total' ).children ('em' ).text (amount.toFixed (2 )+'元' ); } $('.add' ).click (function ( count = $('.num_show' ).val (); count = parseInt (count)+1 ; $('.num_show' ).val (count); update_price (); }); $('.minus' ).click (function ( count = $('.num_show' ).val (); count = parseInt (count)-1 ; if (count <= 0 ){ return ; } $('.num_show' ).val (count); update_price (); });
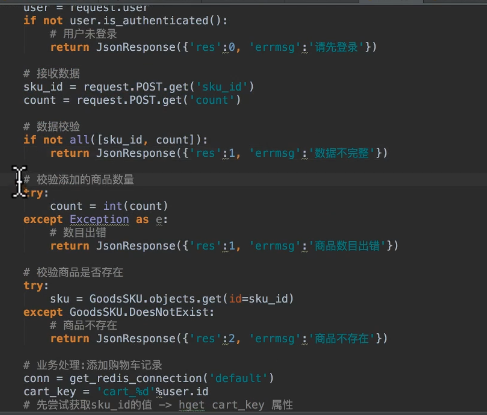
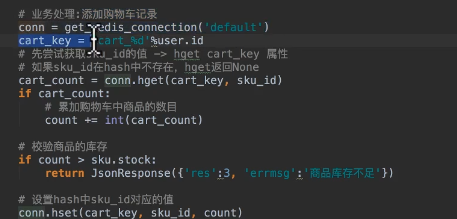
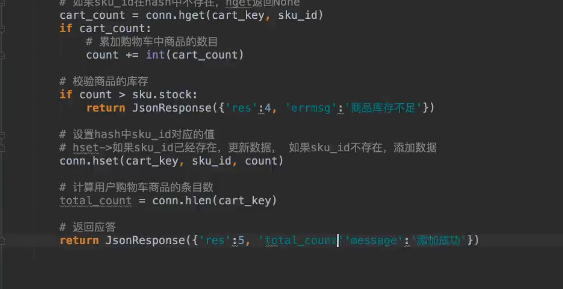
购物车添加的请求设计
流程:
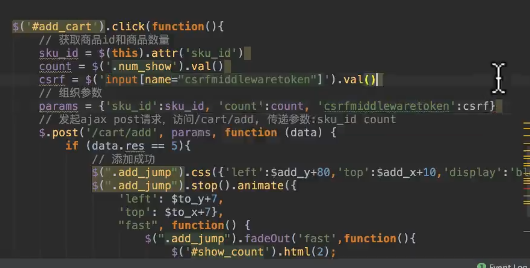
采用ajax, post请求
传递参数,商品ID,数量
目前为止,有post,get,url三种类型的请求类型,
另外,django防止csrf的方式,默认打开csrf中间件,post提交时加上csrf token标签


 wechat
 alipay